This was a super simple and not very expensive project. I needed a way to watch the ponies in the horse box whilst we are travelling. Obviously you can buy systems that do this, but they are expensive – starting at about £150 for a low end one .. and they can get as expensive as £600. I was convinced that I could make something way cheeper than that with a Raspberry Pi .. so I googled.
What you will need to make a surveillance system:
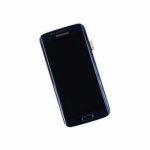 Something to use as a screen – an old phone, tablet as long as it can connect via wi-fi and it has a browser that will work fine.
 Raspberry Pi Zero W – which you can buy from the awesome PiMoroni or PiHut for less than £10
Link to Pi Zero – Pimoroni
Link to PiZero – PiHut
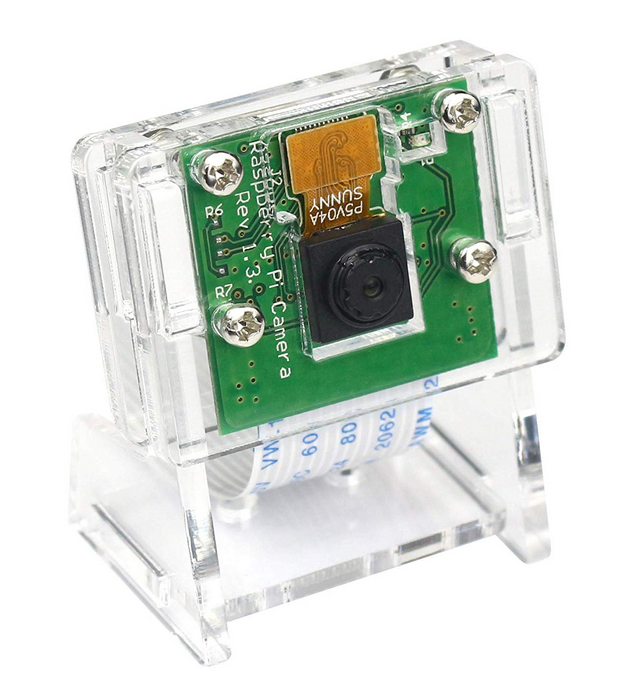
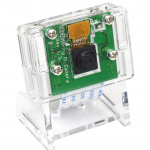 Pi Camera – I have this one from amazon £13 comes with a handy camera holder
Amazon Link to PiCamera
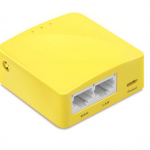 Wireless nano router – again from amazon for less than £20, this allows the Pi to talk to the device to show the streaming video
Amazon Link to Nano Router
Basic Steps
Setting up the Nano Router
Super simple. You normally fire it up and browse to its web interface and login to set it up. Most have very simple guides to set it up and to be honest as its not connecting to anything other than the RaspberryPi and an old phone default settings are fine.
I have changed the wireless settings on mine to call it PonyCam and gave it a sensible password.
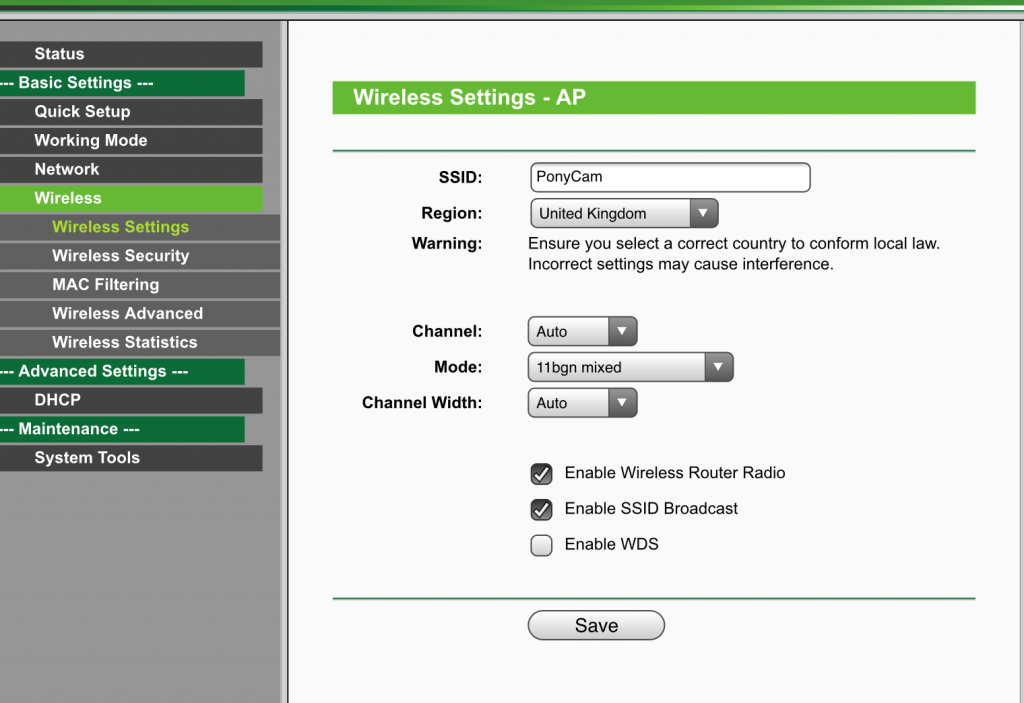
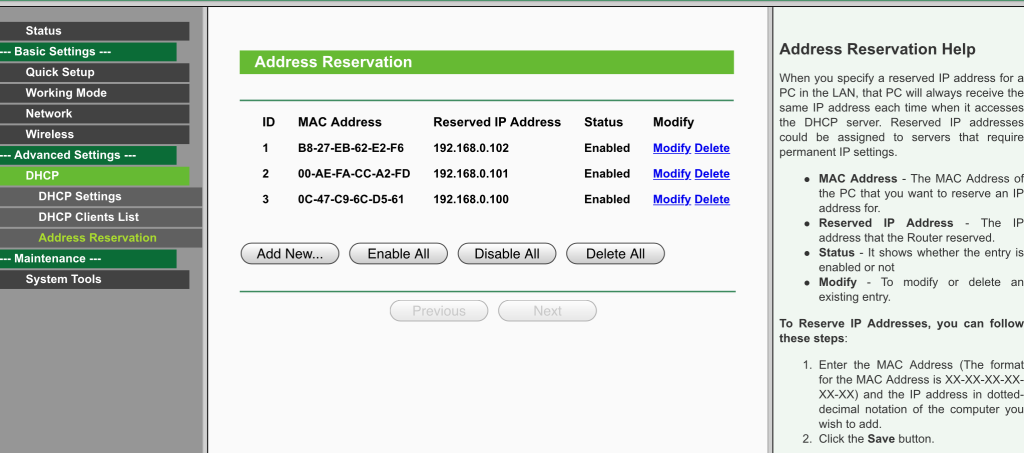
The only other things I have changed is making the IP address of the Pi and phone sticky so they keep the same ones
Setting up the Pi
- Set up the Pi as normal – the lasest version of raspbian and patch it – you can get info about installing if you have never done it before here
- Build the camera housing .. it is a bit fiddly but takes about 5 mins.
- Enable the camera module – Either from the UI
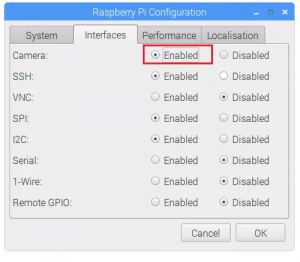
Or the terminal –
sudo raspi-config
and select the Interfacing Options > Enable/Disable the RaspberryPi camera
once complete reboot
- Shut the Pi down and plug the camera in
- Turn it back on
- Attach the Pi to the new wireless network – PonyCam in my case
- Get the IP of your pi – from a terminal
ifconfig
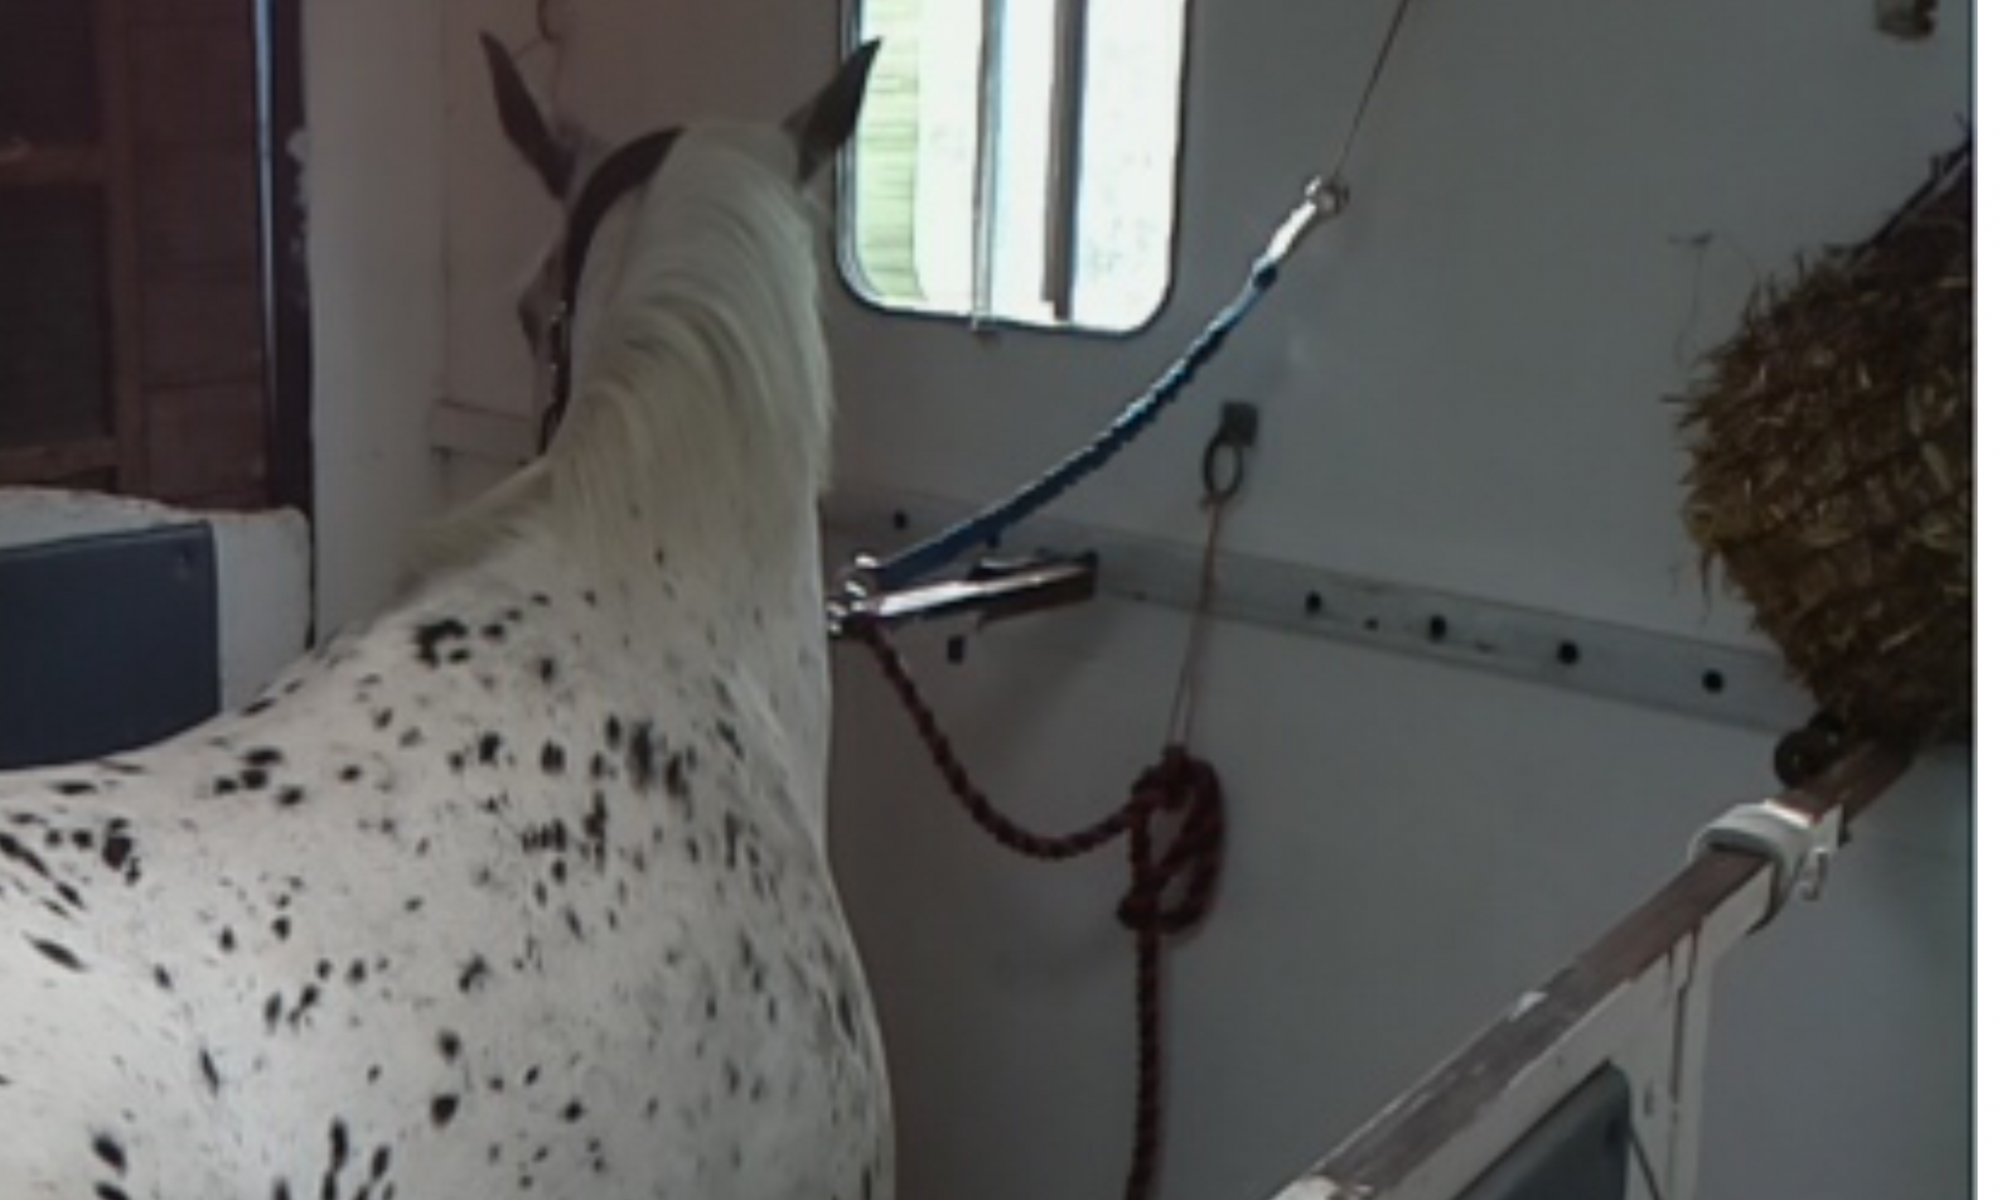
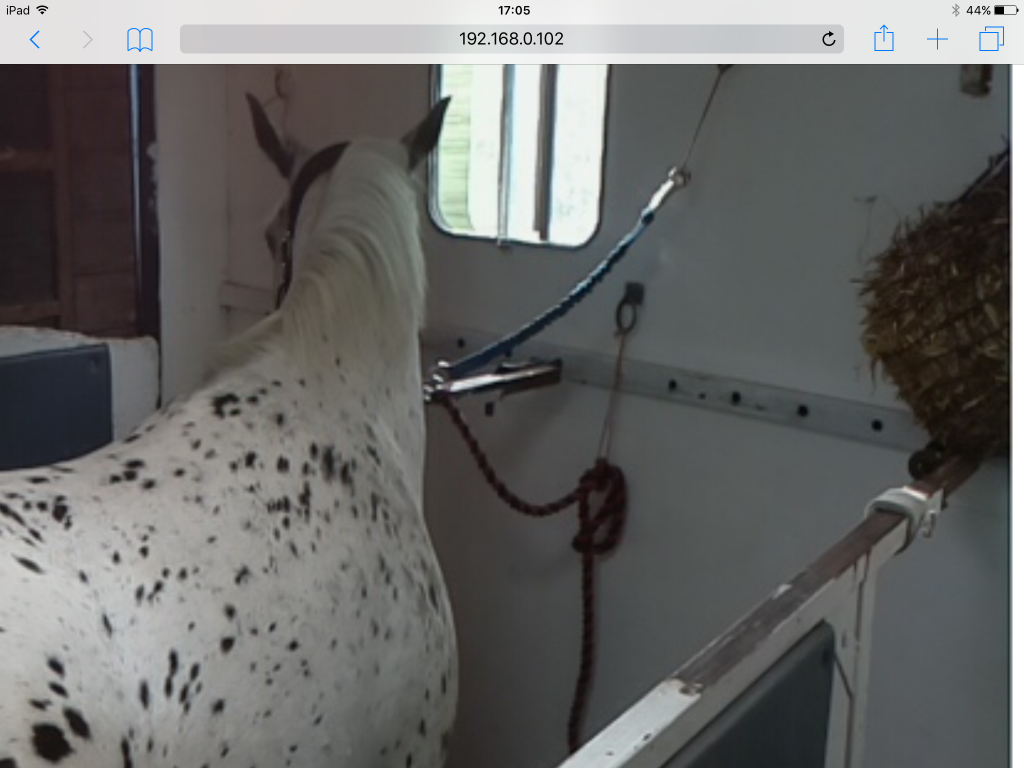
The IP of my Pi is 192.168.0.102 and I have set it in the router to always assign that IP.
nano rpi_camera_surveillance_system.py
- Run the script by running the following command
python3 rpi_camera_surveillance_system.py
- Test the script from the Pi by going to the following url:
http://ipaddressofpi:8000
i.e – http://192.168.0.102:8000
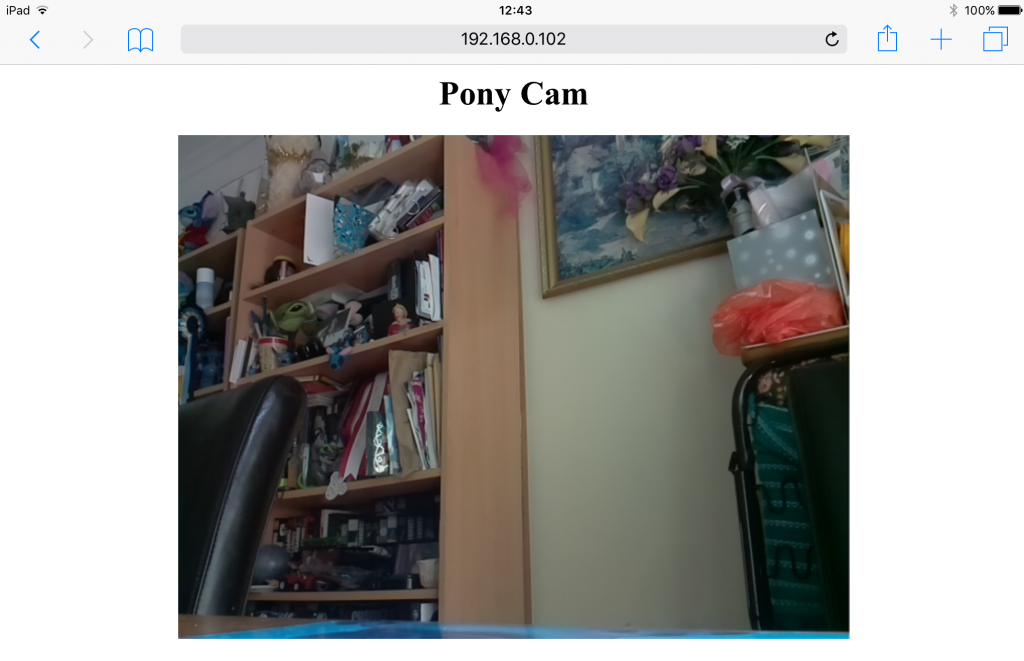
A lovely image of the back of a chair, but it works 🙂
Start up and shutdown
As I am going to want to use this ‘headless’ as a plug and go solution I wanted the script to run on Pi boot and have a way to shut the Pi down nicely rather than just pulling the plug.
Firstly configure VNC
- If you don’t already have one, create a free VNC account
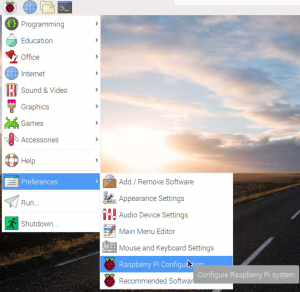
- Enable the VNC from the UI under Preferences > Raspberry Pi Configuration
- This will open up the config dialog, enable VNC
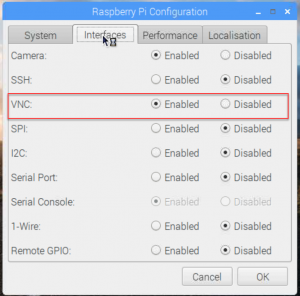
- Once rebooted you can configure the Pi – by default you log in with the standard Pi username and password.
- Install VNC viewer on the phone or tablet and configure it – make sure it is connected to the same wifi as the Pi.
- You can now connecto to the Pi using it’s local IP address and the Pi username and password.
- This will allow you to shut the pi down and command it from the phone or tablet – simples
Add the Camera script to the startup
We now have to add the camera script to the autostart file
sudo nano /etc/xdg/lxsession/LXDE-pi/autostart
- Once the file has opened use the arrow keys to navigate to the end of the 2nd line and press enter. Add the path of the script on to line 3 just above the screen saver.

- Save and close the file and restart the Pi. The camera script will start when the Pi boots.
And there you go .. all done .. I will post an update over the next week with it all installed and working.
The idea for this was taken from the randomnerdtutorials site which has loads of cool Pi camera projects. Use this link here to see the video streaming posts tutorial and thanks to my hubby Nathan for doing some of the grunt work as I was busy working – he is now full of ideas for projects with Pi cameras 🙂